
After hearing several comments from readers that they had never sewn in a zipper before or were intimidated by the thought of installing a zipper, I decided to put together a little tutorial.
I should preface this 'How-to" by saying that it may not be the only way or even the best way to do it. I'm mostly a self-taught, learn by trial and error, kind of
sewist, so precede at your own risk.
LOLGo and gather up your materials (list below) and we'll do a fun project together. Go on...I'll wait...

What you'll need:
*2 pieces of outer fabric fused with interfacing and 2 pieces lining fabric all cut to the same size. (I think mine are 9.5" x 6.5", but this method will work with any size, even a small change purse.)
*A zipper (with nylon? teeth, not metal). (As you can see in the pictures, my zipper is longer than my fabric, which is not a problem. But, ideally you want the full length of the zipper, including the tails, to be at least as wide as your fabric.) Helpful tip: A zipper is sized by the length of the teeth, so figure that a 7"zipper is really 8-8.5"L including the tails. A 9" zipper is 10-10.5"L including the tails, and so on.
*Pins*A zipper foot and regular foot for your machineOk, is everyone ready? Start by layering your first side: a piece of lining face up, zipper face up, and outer fabric face down.

Line up top edges and pin.

Using your zipper foot, sew across the top. When you near the end before the zipper pull, stop
with your needle down in the fabric. Lift the presser foot and open the zipper so the pull is out of your way. Lower the foot and continue sewing to the end.

Now, fold back the fabrics and press.

Next, layer the second side. Lining fabric face up, zipper face up, outer fabric face down.

Line up top edges and pin. This time the zipper pull will be in your way right off the bat, so go ahead and open it up a bit before you start sewing.

Again, when you get to the pull, stop with the needle down in the fabric, close it back up and continue sewing to the end. Fold back and press. This is what your piece should look like.

At this point put the regular foot back on your machine and decide if you want to add a loop tab or label or if you want to top stitch. Usually if I'm using quilt weight fabrics I don't top stitch, but with heavier
barkcloth or decorator fabric I will.
Optional top stitching, loop, and label: To top stitch, sew through the top and lining fabrics. With heavier or bulky fabrics this helps to keep them out of the way of the zipper.

If you add loop tab or label, be sure to sew them to the outer fabric only.
Now,
very important step...open the zipper to an inch or so from the edge of the fabric.

Pin the 2 outer fabrics right sides together and the 2 lining fabrics right sides together. The teeth of the zipper will be pointing toward the lining.

Sew around all 4 edges, leaving a small opening in the bottom of the lining. I also
backstitch over the zipper on each side for added strength.

Now you can clip the corners and trim off any excess zipper if yours was longer, like mine.
Reach inside the lining opening and turn right side out. Sew up the opening in the lining. Press and
TaDa!...you've made a zippered pouch. :-)

See, wasn't that easy?
This project is also part of
The Twice Remembered Cottage "Make Your Monday" link event. Click the link above to see all the fun things bloggers are making this week.
 I made myself a small fabric folder this weekend. I needed something to hold my pattern file cards since having them scattered throughout the sewing room wasn't working for me.
 When I create a new design or pattern, I write down measurements along with small diagrams on basic file cards. I found that, for me, these were easier to keep track of than muslin or plasic templates.
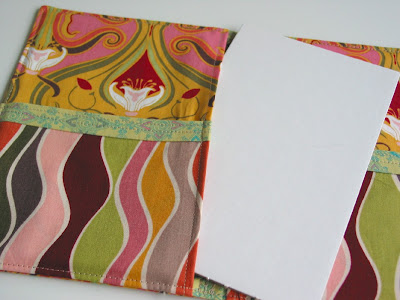
 I'll have to play around with the vinyl and construction or maybe use the matte finish one that I have the next time. But, all in all, I like how it turned out and think it will be very useful. I didn't have time to put together a tutorial, but when I make my next one, I'll show you how I did it. :-)
 This project is also part of The Twice Remembered Cottage "Make Your Monday" link event. Click the link above to see all the fun things bloggers are making this week.


 I've also included an interior zippered pocket on this one.


 Mission accomplished! I found these two Japanese floral prints; the blue is from Joann's Kimono Collection and the orange is from a local quilt shop (didn't get the maker). They both have gold accents which help to tie in with the slight shimmer of the upholstery fabric.
 I turned the lovely
  And the orange became a

 I made it double-sided. A natural linen on one side and a chartreuse-olive linen/rayon blend on the other. I played around with scrunchy ruffles and originally thought I might just leave the edges raw and frayed, but in the end decided on a slightly more finished application.
  And for some color, I added little posies made from gorgeous Patricia Bravo fabric (of Art Gallery Quilts).
 For my first scarf, I'm pretty happy with the way it turned out. :-)