 This week I made a couple more fabric portfolio folders, and so as promised, I'm here to show you how I made them. I decided not to use the iron-on vinyl with these, but I'm not totally giving up on the laminated cover idea, yet. ;-)
Let's get started...
1.) First you'll need 3 pieces of fabric all cut to 13"x10". (you can customize the size to your specific needs). And 2 pocket pieces 6.5"x5.5".
 2.) Iron a fusible interfacing to the 2 fabrics that will be your outer and lining fabrics and cut the third piece in half so you have 2 pieces 6.5"x10".
3.) Next, hem the top of the pocket pieces and baste them onto the fabric that you just cut in half. I also added a small strip of fabric to hold a writing pad.

4.) Now, fold back the inside edge of these two pieces about a half an inch. Press and stitch down.

5.) Position pocket pieces onto your lining fabric. (I left a 1" gap between the two sides.) And sew around all four sides.


6.) Next, with right sides together, pin your outer fabric to your lining and pocket fabric. Sew around all four sides leaving a small opening in the bottom.
7.) Clip corners and turn right side out through the opening.
8.) Press and top stitch around the sides being sure to close up the opening in the bottom.
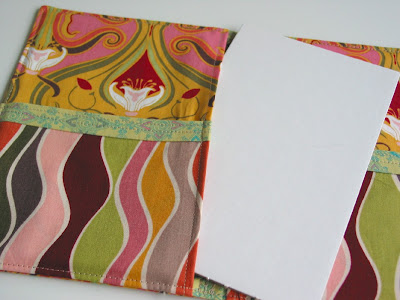
 10.) Cut cardboard to size and slip between the pocket and lining.
 11.) Slip in a 5x8 writing pad and you're done!
 If anything isn't clear, just yell.
 If you're not ready to try this project on your own, I'll have a few of these in pretty vintage fabrics on the website or in the Etsy shop this week.
Happy sewing!
This project is also part of The Twice Remembered Cottage "Make Your Monday" link event. Click the link above to see all the fun things bloggers are making this week.


 When I create a new design or pattern, I write down measurements along with small diagrams on basic file cards. I found that, for me, these were easier to keep track of than muslin or plasic templates.
 I'll have to play around with the vinyl and construction or maybe use the matte finish one that I have the next time. But, all in all, I like how it turned out and think it will be very useful. I didn't have time to put together a tutorial, but when I make my next one, I'll show you how I did it. :-)
 This project is also part of